Woodland Photography Tips
The Ultimate Woodland Photography Technique That Gets Results: A Welsh Masterclass
If you have spent any time trying to master woodland photography, you have almost certainly encountered the ultimate photographer’s paradox. You head out into nature, inspired by breathtaking images of misty, ethereal forests you’ve seen online. You find a local patch of trees, set up your tripod, peer through the viewfinder, and… nothing. Instead of an artistic masterpiece, your frame is filled with a messy, cluttered, distracting jumble of branches.
If you are struggling with your outdoor photography and feeling completely frustrated by the sheer chaos of the forest, let me reassure you: you are absolutely not alone. Capturing the complex, multi-layered structure of a forest can be incredibly challenging.
However, I have definitive advice that will completely change your results. In fact, it is my number one woodland photography tip. To put this rule to the test, I recently took a trip to a spectacular, hidden gem of a valley in Wales. (See below for location)
In this comprehensive guide, I am going to break down the exact strategies, settings, and compositional mindsets I used during this trip to turn cluttered, midday summer scenes into clean, impactful fine-art landscape images.
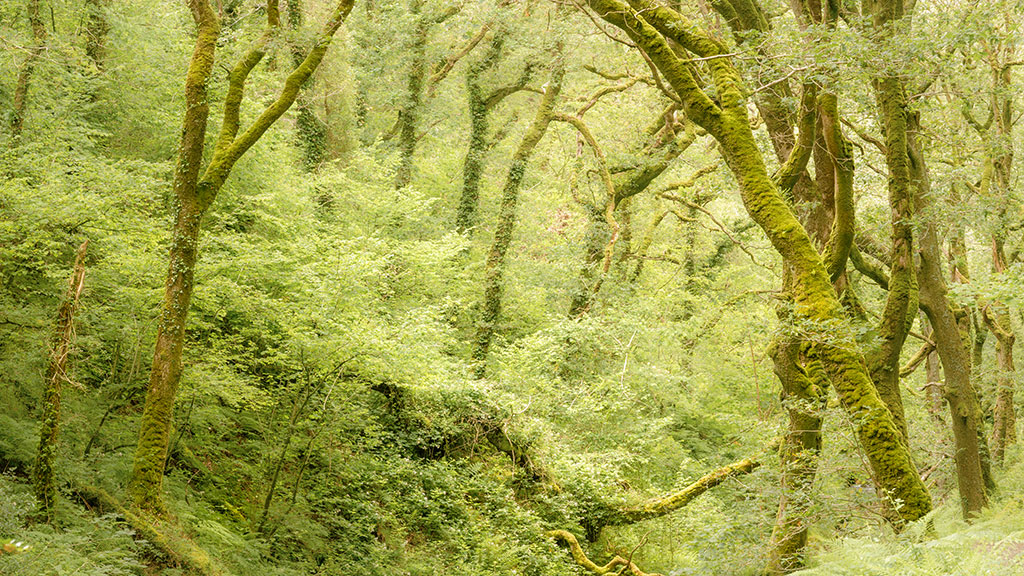
In this video, The Woodland Photography Technique That Gets Results, I put my number one woodland photography tip to the test.
Woodland Photography Tips
The Number One Rule: Go to Prettier Woods
Let’s address the elephant in the forest right away. What is the ultimate secret to dramatic, portfolio-worthy forest photography? Go to prettier woods!
It sounds blindingly obvious, almost painfully simple. Still, you would be absolutely amazed by how many photographers head to their local dog-walking woods and wonder why they cannot replicate the jaw-dropping imagery they see on social media.
The reality is quite straightforward: most local, modern woods are not ancient woodlands. They simply do not possess the age-old character, the gnarly structures, the deep moss-covered forest floors, or the unique natural styling required to produce truly striking photographs. Just as you wouldn’t expect to step outside your back door and capture epic Iceland- or Glencoe-style mountain landscapes without travelling to them, the same principle applies to the forest.
If your local patch of trees lacks character, you are fighting an uphill battle from the start. To get spectacular results, you need to seek out spectacular locations.
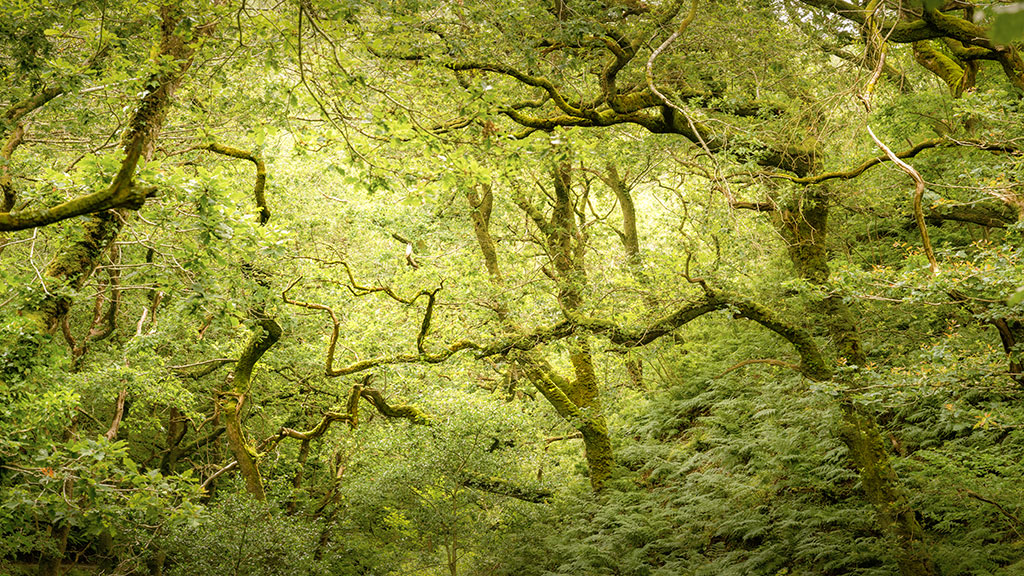
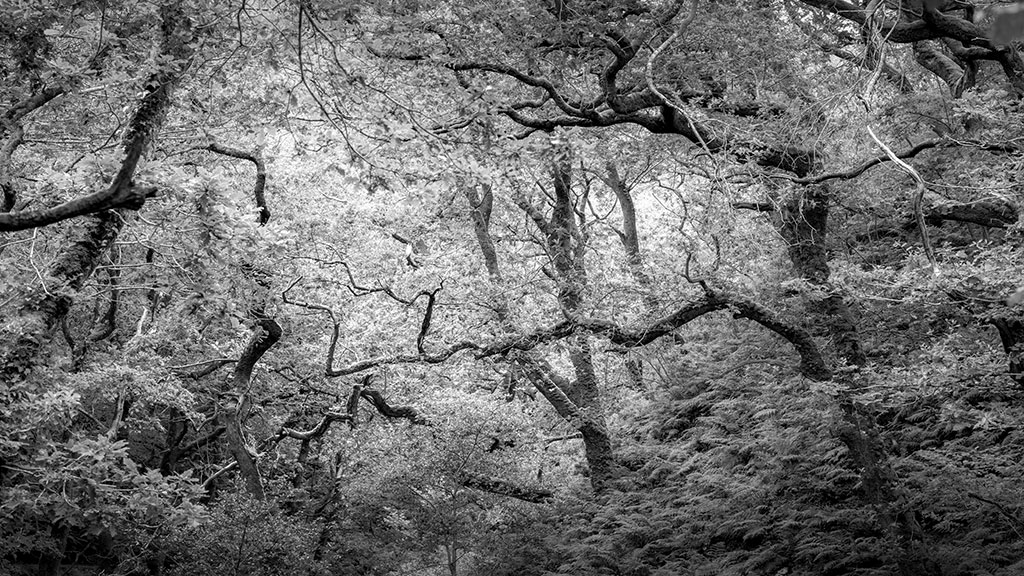
The Welsh Discovery: A Happy Accident
Interestingly, the reason I found myself in this breathtaking Welsh woodland was a complete accident. I had spent the previous couple of days up on the hills photographing military aircraft at the famous Mach Loop. The aviation photography hadn’t been great, but while I was in the area, the creative itch struck. I found myself wondering if there were any interesting, photogenic woodlands nearby where I could shift gears into some quiet woodland photography.
So, I did what anyone would do: I simply opened Google and searched for “good looking woodlands near me”.
To my surprise, an ancient valley woodland popped up just a 30-minute drive away. I arrived at tea time the evening before my shoot, around 6:00 pm, intending to go for a quick exploratory scout to see if the location was worth returning to with my heavy camera gear the following day.
I set off with nothing but my iPhone in my hand, purely looking for interesting compositions. I ended up walking for miles, tracking through every single millimetre of that woodland. In fact, I got so utterly lost in the beauty of the place that I barely made last orders at the local pub!
Within the first ten minutes of that scout, I was completely blown away by what I managed to capture on a mobile phone. The sheer abundance of textured bark, twisting branches, and dramatic topography meant I had to return the next morning with my full camera setup.
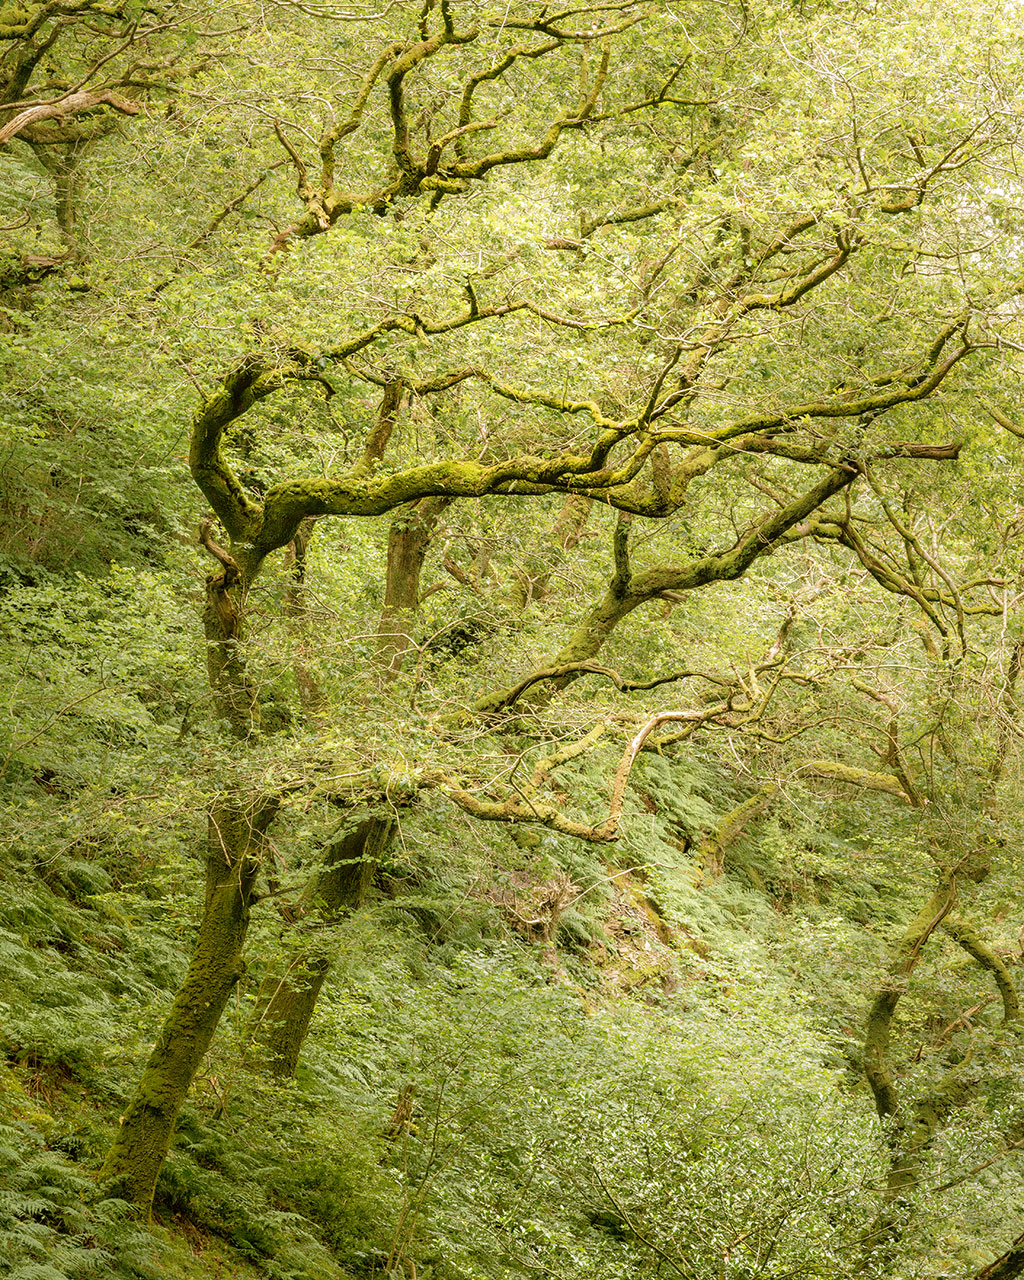
Anatomy of a Perfect Woodland Location
When analysing why this specific Welsh forest works so beautifully for woodland photography, it comes down to two major environmental advantages: accessibility and topography.
1. Simple Accessibility
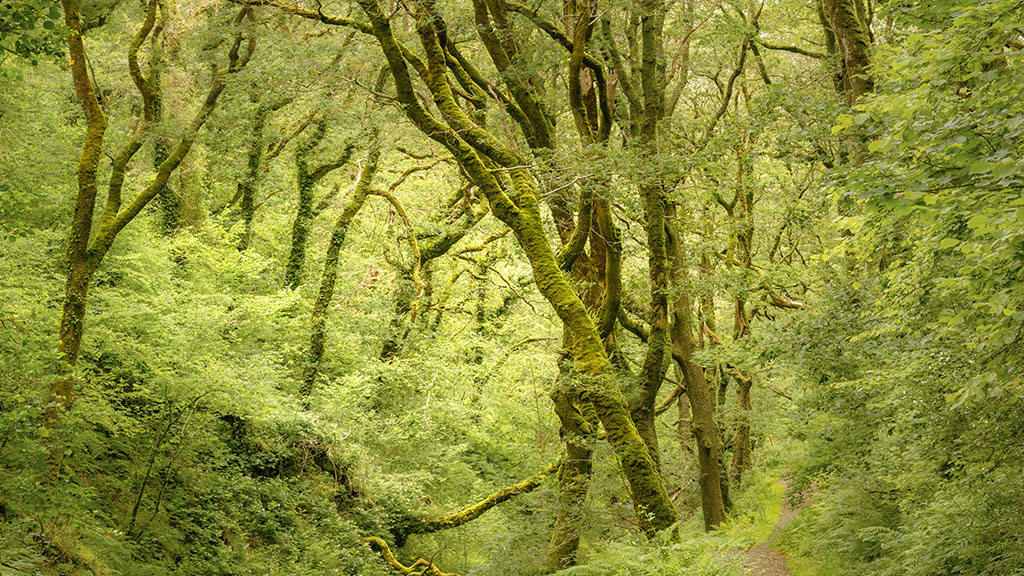
A location doesn’t need to require an arduous, five-mile trek to be spectacular. This particular spot features an incredibly amenable, straightforward car park. From there, it is merely a five-minute walk up a slightly steep incline to immerse yourself completely in the dense canopy. When you aren’t completely exhausted from a brutal hike, your mind remains sharp, creative, and fully focused on composition.
2. The Steep Valley Topography (Beating the Sky Problem)
This is the real geographical secret of this woodland. The forest is nestled deep down low in a steep valley. The land to the left and right slopes dramatically upwards, stretching all the way towards the sky.
Woodland Photography Tips – Why is this an absolute game-changer for woodland photography composition?
Because no matter whether you point your camera left, right, forward, or backwards, you can completely avoid including the sky in your frame.
In forest photography, an overcast or bright sky peeping through the top of the trees is often the enemy. It creates harsh, blown-out white patches that instantly distract the viewer’s eye away from the rich textures of the trees. Because this valley naturally blocks out the horizon, you are forced to look purely at the internal structure of the woods: the patterns, the shapes, the natural frames, and the ultimate creative challenge, controlling the chaos.
- STEEP VALLEY WALL
- Trees extending upwards, blocking out the sky
- CAMERA FRAMED SCENE
- Pure texture, moss, and tree trunks
- Zero blown-out sky distractions
- VALLEY FLOOR
Overcoming Bad Lighting and Summer Conditions
Before we dive into the technical setup, let’s establish an important disclaimer about the day of the shoot: the conditions were completely imperfect.
It was a standard summer’s day, right in the middle of the day. There was absolutely no morning mist, no atmospheric fog, and no golden hour glow. The sun was hidden behind a thick, uniform layer of grey cloud, with only occasional patches of flat light peeping through the heavy green canopy.
Muscling through a midday summer shoot is something most photography guides tell you to avoid. However, I look at it from a completely different perspective. If you can apply solid photography tips to extract elegant, compelling images on a flat, uninspiring summer afternoon, just imagine how mind-blowing your images will look when you return under prime conditions, like a damp autumn morning with mist rolling through the branches!
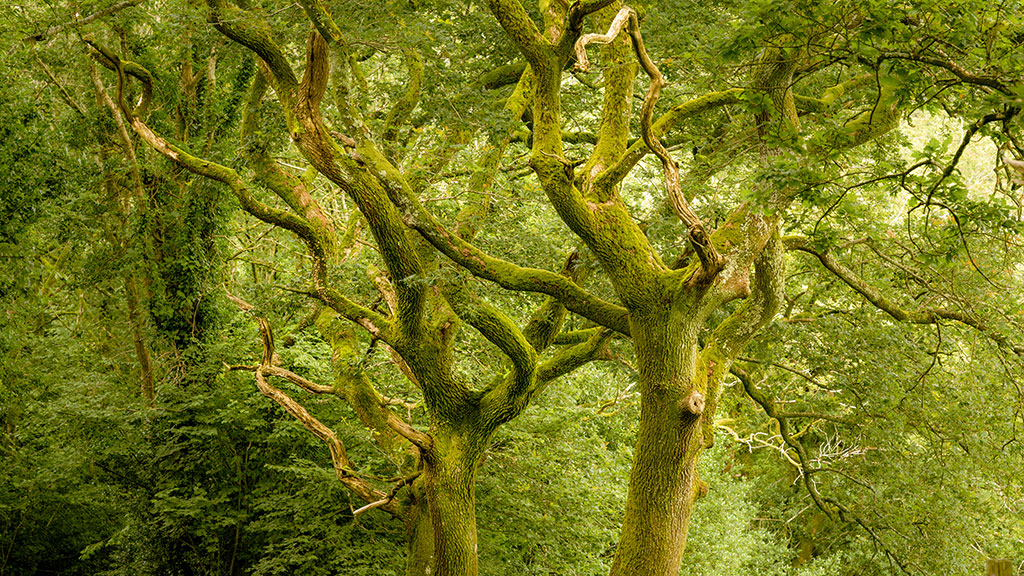
Flat light actually gives you an incredible opportunity to study the raw form, line, and character of the trees without being blinded or fooled by dramatic sunbeams.
The Essential Woodland Photography Gear Setup
Shooting inside a dense canopy requires a specific approach to your gear. Because you are dealing with low ambient light and complex reflections, you need a highly stable, deliberate setup to ensure your images are technically flawless.
Equipment
- Solid Tripod | Essential for sharp images in dark, low-light canopies.
- Circular Polariser| Eliminates glare on wet leaves; boosts green saturation.
- Telephoto Zoom | Isolates distant compositions and compresses the chaos.
- Camera Collar | Rapidly switches between landscape & portrait framing. (Optional, of course)
The Uncompromised Need for a Tripod
A rock-solid tripod is non-negotiable when you step into the woods. Even in the middle of the day, a dense tree canopy swallows an immense amount of light. If you try to hand-hold your camera, you will quickly find your shutter speeds dropping down to a 10th or a 15th of a second. Attempting to hand-hold at those speeds will inevitably result in soft images destroyed by camera shake. A tripod slows down your workflow, forces you to compose with intent, and guarantees pixel-sharp results.
The Magic of the Circular Polariser
If there is one filter you must keep on your lens for outdoor photography, it is a circular polariser. Leaves, wet bark, and moss are highly reflective surfaces. Even on a dry day, a thin layer of sky glare sits on top of the foliage, washing out its natural colour.
By rotating a polariser, you cut right through that unwanted surface reflection. Suddenly, the shiny glare vanishes, revealing the deep, rich, saturated greens and earthy browns hidden underneath. It makes the entire forest look crisp, lush, and incredibly tactile.
Ditching the L-Bracket for a Camera Collar
During this Welsh trip, I put a unique piece of kit to use: a specialised camera collar sent to me by NiSi. Now, to be fully transparent, my channel is supported by NiSi, but this post isn’t sponsored, and they didn’t ask me to talk about it. However, as someone who has historically actively disliked traditional L-brackets, this tool is a genuine game-changer.
I’ve always found conventional L-brackets clumsy; they block the side ports of the camera, make it difficult to fully open or tilt your live-view screen, and interfere with quick battery changes. Because of that, I used to rely entirely on flopping my tripod head over into the side notch to shoot vertically.
The NiSi collar attaches directly to the base of the camera and encircles the lens mount area. With a quick, smooth twist of a knob, you can seamlessly rotate the entire camera body from landscape to portrait orientation instantly, without moving your tripod head or shifting your centre of gravity. For woodland work, where you are constantly alternating between wide horizontal vistas and vertical tree trunk frames, it makes the physical workflow remarkably fluid.
NiSi Wizard Camera Bracket: CLICK
The In-Camera Hack: Pre-Visualising the Final Image
Let’s talk about a powerful psychological hack that will completely change how you shoot in the field: manipulating your in-camera white balance.
If you shoot in RAW format, you already know that you can alter your white balance to whatever temperature you want during post-processing without losing any image quality. Because of this, standard advice dictates leaving your camera set to Auto White Balance (AWB).
However, AWB has a bad habit of trying to neutralise colour casts. In a lush, green forest, AWB will often render the raw image on the back of your LCD screen as cold, blue, muddy, and sterile. When you look at a flat, uninspiring preview image in the field, it drains your creative enthusiasm. You begin to feel like you are taking poor photos, which kills your motivation to keep exploring.
- [Auto White Balance (AWB)] –> Renders forest flat, cold, and muddy on LCD.
Result: Creative discouragement. - [Shade/Cloudy Preset] –> Injects warm, golden-green tones into the LCD.
Result: Pre-visualises the post-processed artistic intent.
To combat this, I manually switch my camera’s white balance preset to **Shade** or **Cloudy** before I take a single shot. By selecting the Shade preset, you force the camera to inject rich, warm, golden tones into the JPEG preview displayed on your screen.
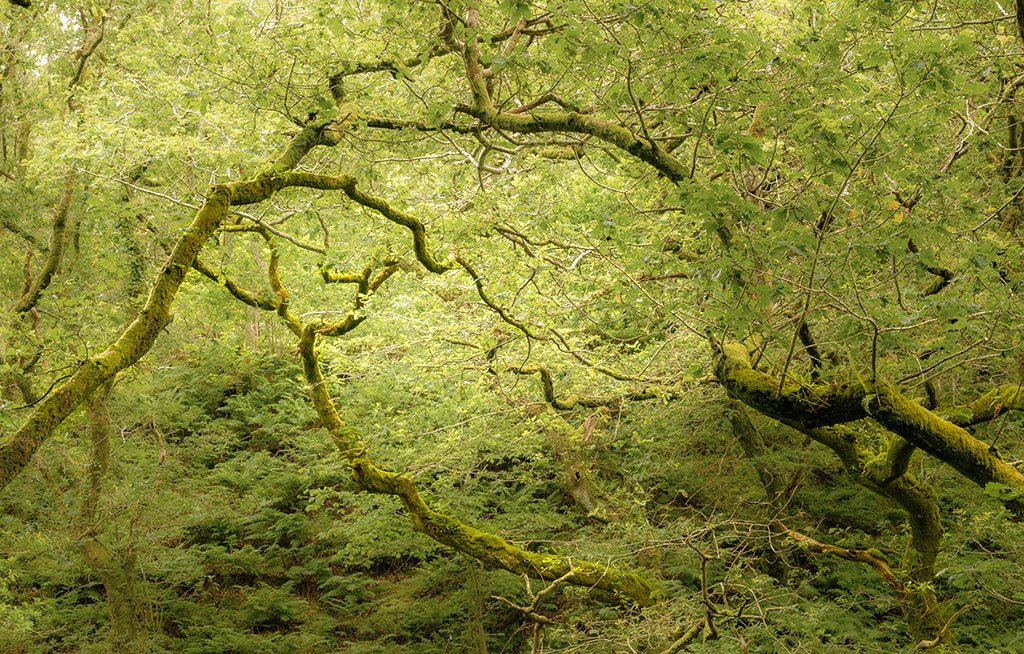
Suddenly, the image on the back of your camera looks beautifully warm, lifelike, and highly representative of how the file will look *after* it has been properly processed and edited. It gives you an accurate impression of the scene’s ultimate artistic potential, keeping your confidence high and your creative eye sharp while you work.
Compositional Strategies: Finding Order in the Chaos
The absolute core of successful nature photography in the forest is learning how to isolate a subject from surrounding visual noise. When you stand in a forest, your eyes naturally zoom in on beautiful individual details because your brain filters out the background clutter.
Unfortunately, a camera lens is entirely literal; it records every single branch, twig, leaf, and bramble with equal importance. To build a great image, you must learn to see like a lens. Here are the specific practical composition techniques I used during my Welsh outing to tame the forest wilderness.
1. The Power of Lens Selection: The Viewfinder is Your Best Friend
When you look at a forest scene with the naked human eye, your peripheral vision is incredibly wide, roughly equivalent to a 35mm or 50mm perspective. It is very easy to feel entirely overwhelmed by the sprawling mess around you.
One of my absolute favourite methods to combat this is to completely stop looking at the wider environment and instead analyse the woodland strictly through the camera viewfinder or via the live-view screen.
While I shot several wide compositions at 24mm during this trip, my absolute favourite tool for woodland photography is a telephoto zoom, specifically a **70-200mm lens**. On this trip, I found myself regularly zoomed all the way in to around 90mm or 100mm.
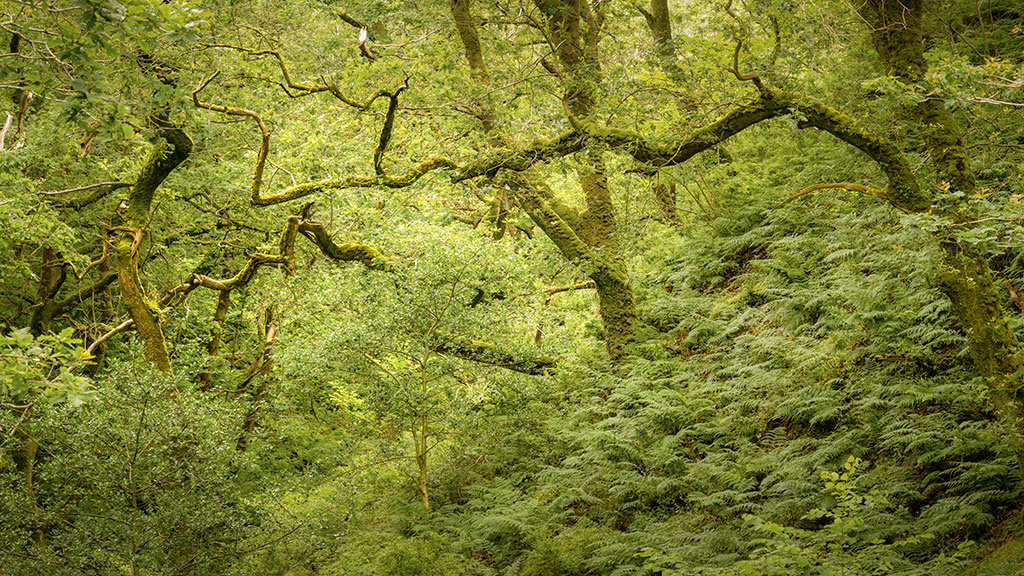
A telephoto lens acts as a visual scalpel. It compresses the perceived distance between objects and allows you to crop out the messy foregrounds, the distracting side branches, and the sky. By zooming deep into a distant pocket of the forest, you can isolate beautiful, gnarly tree trunks that the naked eye would completely miss from a distance. You could walk past a completely unremarkable tree by the edge of a path, but when you look through a telephoto lens at 100mm, you instantly extract a dramatic, intimate portrait of textured bark that looks like it belongs deep in a mystical wilderness.
2. Creating Natural Frames within Frames
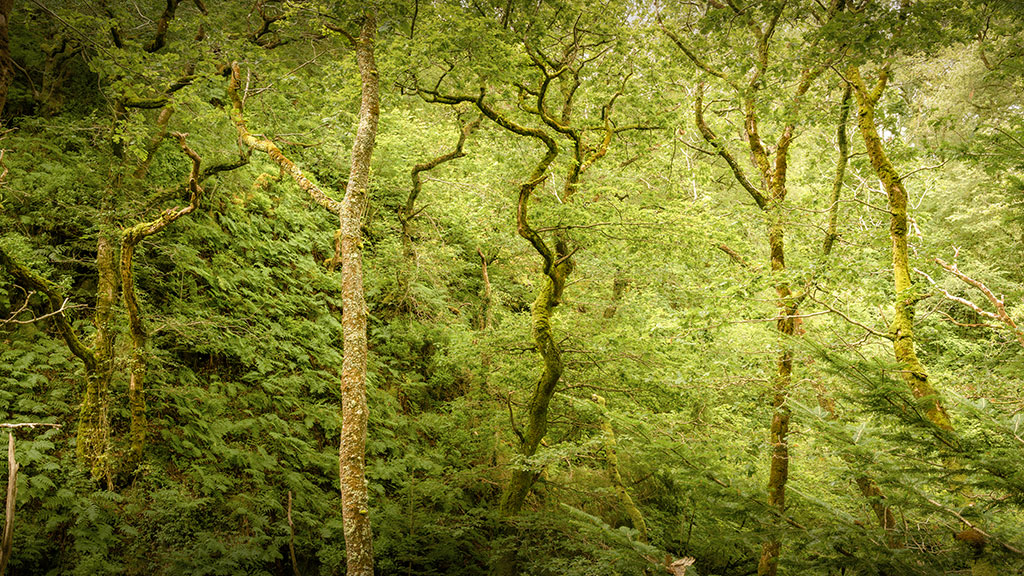
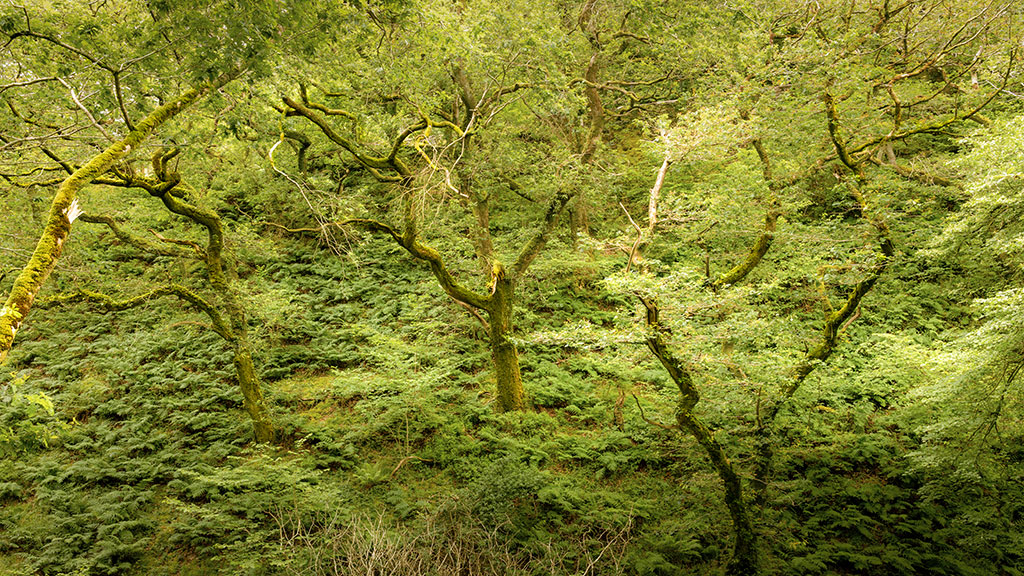
One of the first successful setups from the Welsh trip involved using dominant foreground elements to frame a chaotic background. I located a section of the forest where a strong, healthy vertical tree trunk stood proud on the left side of the frame, balanced perfectly by another distinct trunk framing the right.
These two clean, powerful vertical lines acted as strong visual brackets. By placing these elements at the outer edges of the frame, it created a controlled “window” that safely contained the abstract tangle of branches in the centre. The viewer’s eye is anchored by the clean, simple borders, allowing them to safely enjoy the complex patterns inside without feeling overwhelmed by an unconstrained mess.
3. Rethinking the Rules of Thirds
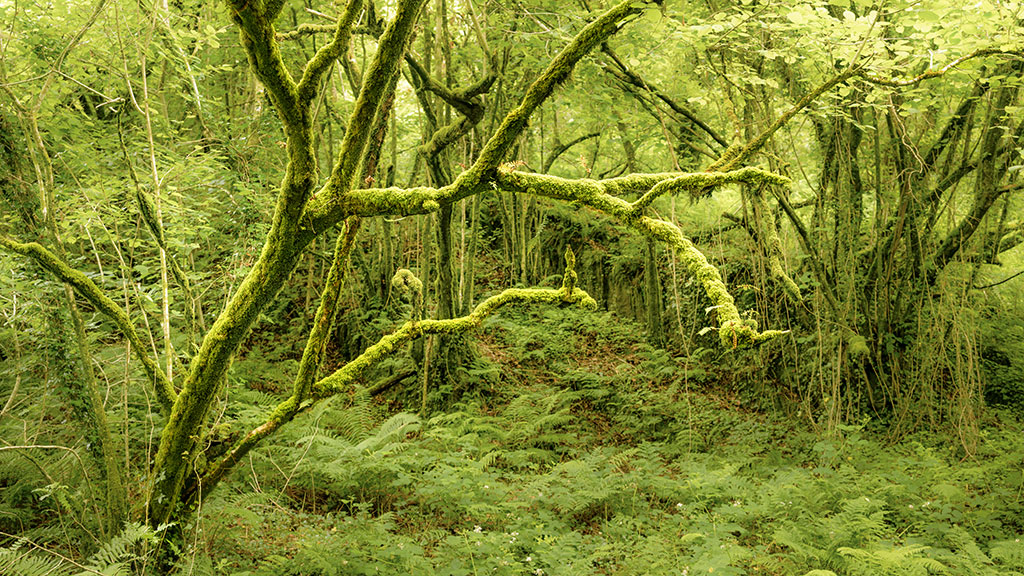
We are all taught to rigidly follow the classic Rule of Thirds, placing your primary subject strictly on the left or right vertical grid lines. In the forest, this rule can absolutely yield stunning results. For example, placing a single, prominent, moss-covered tree on a third line while allowing its elegant branches to reach across into the open negative space on the opposite side creates a beautiful sense of balance and movement.
However, you mustn’t become overly stuffy or dogmatic with these guidelines. In many scenarios, centring your subject dead-on in the middle of the frame is the absolute best way to convey a powerful sense of stature, symmetry, and graphic order. If a tree possesses immense character, a massive gnarly trunk, or unique twisting roots, place it right in the centre and let it dominate the narrative.
4. Moving Your Feet (Don’t Be Lazy!)
The forest is a game of inches. You can set up your tripod, find a stunning composition, and then suddenly realise there is a tiny, distracting twig jutting directly into the bottom-left corner of the frame.
Don’t be lazy! Avoid the temptation to stay put and promise yourself you’ll just clone it out later in Photoshop. A simple adjustment- physically taking a half-step to the left, dropping your tripod down a few inches, or tilting the camera slightly- is often all it takes to completely hide an annoying distraction behind a closer tree trunk. Treat composition as an active, physical process. Move your body, adjust your height, and work the scene until the borders of your frame are entirely clean.
5. Embracing Bold Aspect Ratios: The Square Crop
As a general landscape photographer, I will openly admit that I traditionally do not like square crops; I almost always shoot in a native 3:2 or a cinematic 16:9 widescreen format. However, one of the absolute greatest joys of forest photography is that it regularly forces you out of your comfort zone.
During this Welsh excursion, I came across an incredibly chaotic scene featuring three distinct standing trees interwoven with a fallen, decaying trunk cutting diagonally through the undergrowth.
Attempting to capture this in a wide landscape format felt messy and disjointed. Flipping it to a standard vertical portrait orientation left too much empty space at the top and bottom.
The solution? A 1:1 square crop.
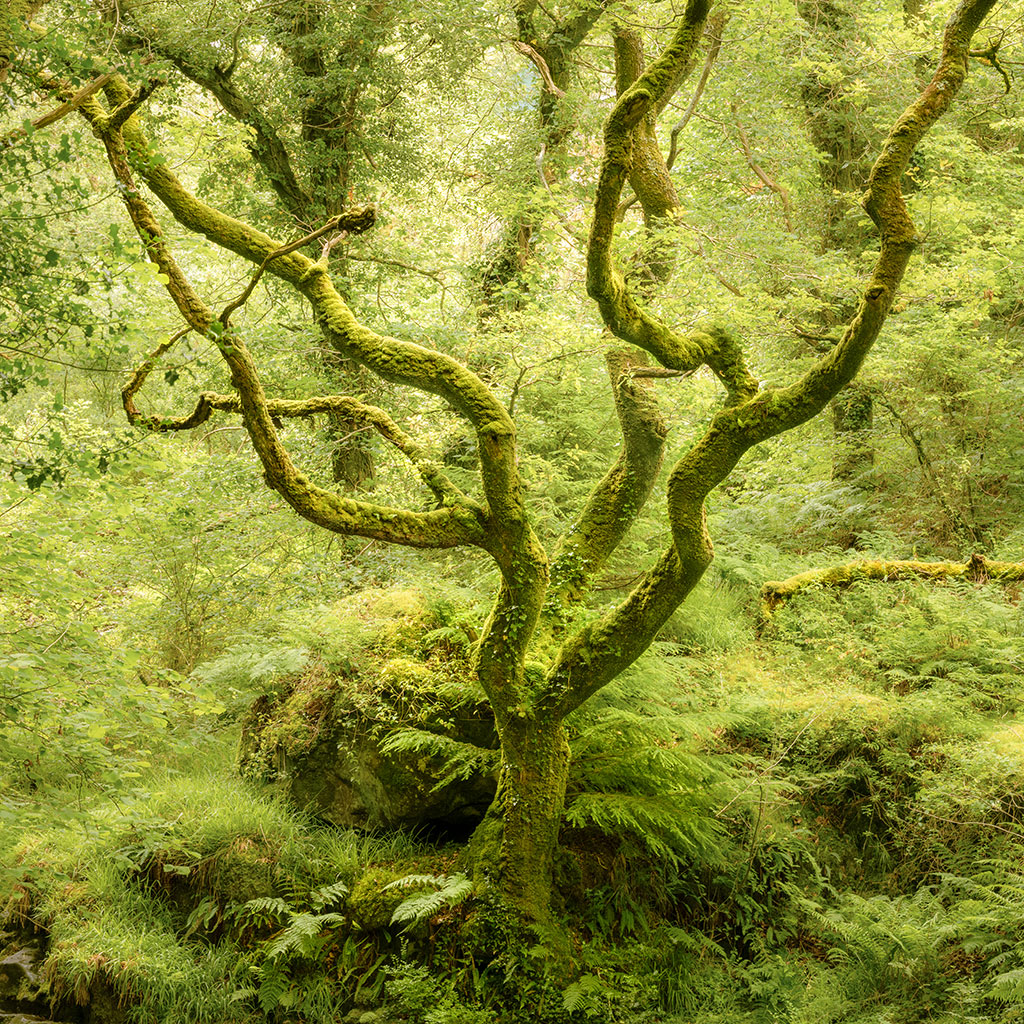
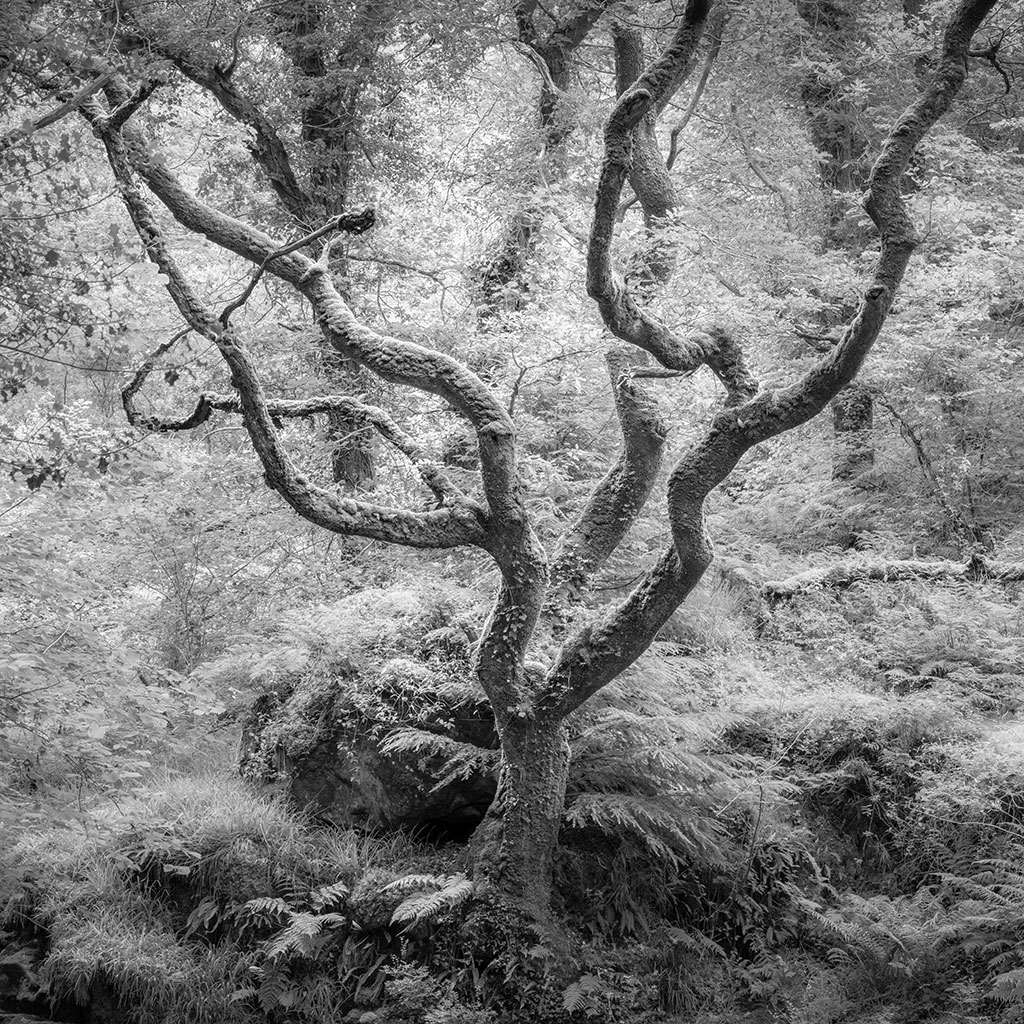
By constraining the scene into a perfect square, you strip away the unnecessary lateral space; compression takes over, and the focus shifts entirely onto the geometric interplay of the lines, angles, and textures. It proved to be a magnificent success, reminding me that we must always choose the crop that suits the subject, rather than forcing the subject into our preferred crop.
Developing Your Post-Processing Mindset in the Field
When you are locking down a composition in the forest, you must simultaneously think about how you prefer to post-process your images. The decisions you make in your editing suite should actively guide your exposures and settings while standing at the camera body.
In woodland work, you generally have two distinct stylistic avenues to pursue:
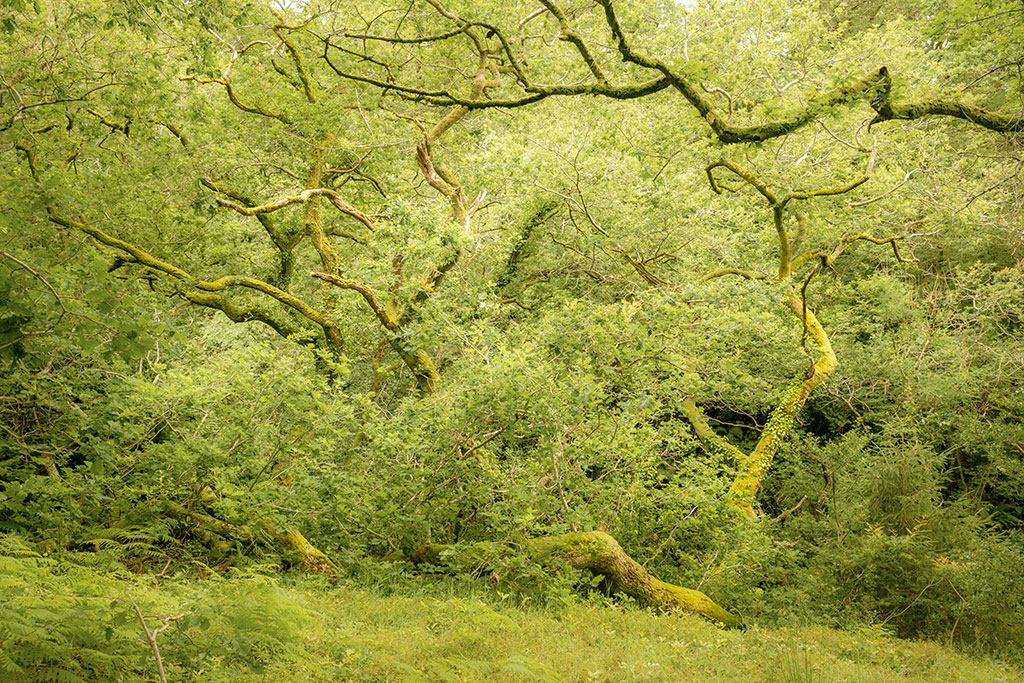
The Light, Pastel, and Airy Approach
The Vibe: High-key, gentle, dreamy, and illustrative.
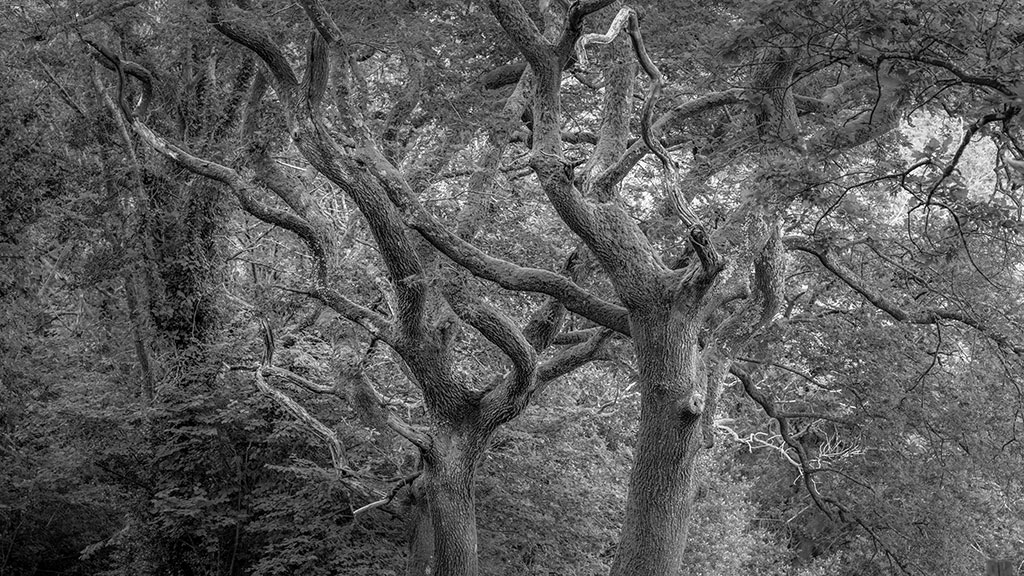
The Technique: You intentionally lift and open up the shadows to reveal every single hidden detail in the dark bark and ground cover. You desaturate and soften the primary tones, shifting the bright summer greens into delicate, muted pastels.
Exposure Priority: You must ensure you do not overexpose the brighter parts of the leaves or any tiny glimmers of light breaking through the canopy, keeping your highlights perfectly intact so they can be softened later.
The Dark, Moody, and Contrast-Rich Approach
The Vibe: Fine-art, dramatic, mysterious, and high-impact.
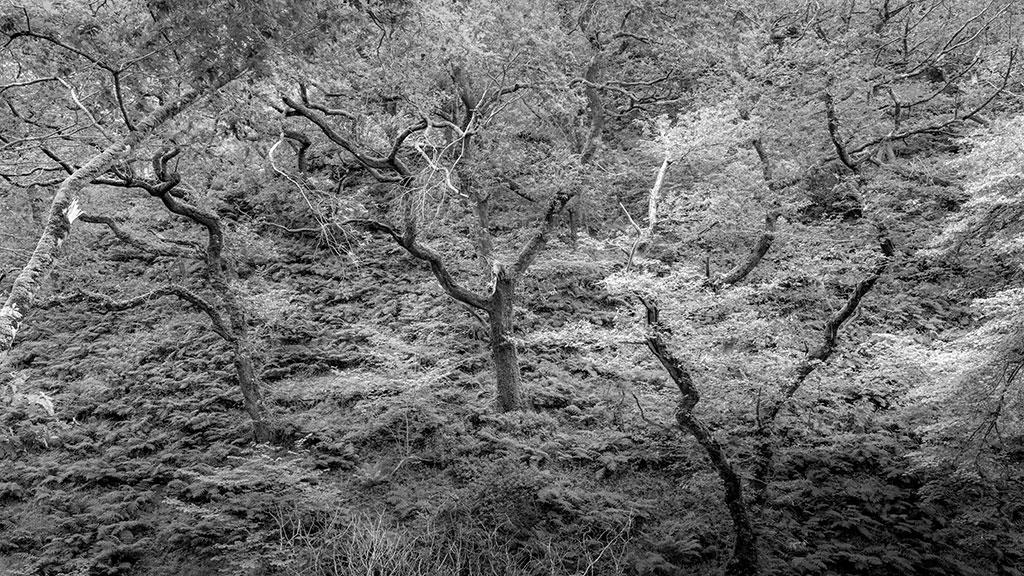
The Technique: You deliberately darken the overall exposure, pulling down the shadows to create deep, rich black areas that drop into total mystery. You push the contrast, forcing the subtle highlights on the edges of the moss and leaves to aggressively pop out against the darkness.
Exposure Priority: You are exposing primarily to preserve the delicate highlights on the tree trunks, letting the chaotic background fall naturally into shadow to simplify the image.
By choosing your processing style *before* you press the shutter button, you can perfectly tailor your exposure adjustments using your camera’s histogram, ensuring you capture the ultimate digital canvas for your final creative vision.
Technical Summary Checklist for Forest Photography
To ensure you walk away with incredible images on your next woodland excursion, keep this simple technical checklist handy:
- Location Choice: Avoid basic local parks; search out ancient woodlands with high structural character.
- Topography: Look for valleys, hollows, or steep banks to naturally exclude the sky from your framing.
- Stability: Always use a solid tripod; maintain a low ISO (e.g., ISO 200) for maximum image quality, and let the shutter speed drag out as long as necessary.
- Aperture Sweet Spot: Shoot predominantly at **f/8** or **f/11** to ensure a deep, crisp depth of field across the entire frame, unless you are deliberately trying to create a blurred background with a shallow depth of field.
- Reflectivity Control: Keep a circular polariser attached to your lens to eliminate glare on the wet foliage and boost natural colour saturation.
- In-Camera Visualisation:** Switch your white balance preset to **Shade** to see a warm, encouraging, pre-processed preview on your LCD screen.
- Chaos Management:** Utilise telephoto lenses (something like: 70-200mm) to isolate details, use framing trees to corral the mess, and don’t be afraid to experiment with bold square crops.
Final Thoughts
Woodland photography is widely considered to be one of the most difficult genres of landscape photography, but it is also arguably the most rewarding. It teaches you how to truly *see*, to decode abstract lines, manage complex geometric clutter, and construct order out of raw natural chaos.
The next time you find yourself entirely overwhelmed by the dense mess of a forest, take a deep breath, slow down, and put my number one tip into practice. Pack up your gear, leave your local dog-walking park behind, and go find an ancient, character-filled woodland that provides the beautiful raw materials your artistry deserves. Look through that telephoto viewfinder, isolate the shapes, control the reflections, and let the magic of the woods reveal itself to your lens.
- Where is this woodland?
This woodland is Nant Gwernol CLICK - Where do you park?
There is a public parking area 500 yards away from the woodland entrance CLICK - Where is the woodland entrance?
From the public car park (Y Ganolfan Gymunedol Parking), walk towards the woodlands, which will take you past a cafe to your right and houses to your left. Walk up a steep hill; don’t worry, it’s only a short walk. You’ll then find the woodland entrance to your right.
There are two or three different routes you can take. They’re all excellent and not too difficult.
Gary Gough
Professional Photographer | West Yorkshire
www.garygoughphotography.co.uk
► WORKSHOPS
► ABOUT ME
► MY GEAR
► FACEBOOK
► YOUTUBE
► INSTAGRAM
Tell us about your thoughtsWrite message