Landscape Photography Cobbolds Point
There are some photography locations where everything seems to fall into place. The light is beautiful, the sky is full of interest, the tide is exactly where you want it and you can spend several hours happily wandering around with a camera.
And then there are days like this one.
My visit to Cobbolds Point in Felixstowe, Suffolk, was certainly not a disaster, but the lighting conditions eventually became pretty brutal. In fact, by the end of the shoot I was struggling to keep my eyes open because the sunlight was so intense.
But that is one of the things I enjoy about landscape photography. When conditions are difficult and you still manage to come away with an image you are genuinely pleased with, there is a real sense of achievement.
This was also a completely unplanned photography trip. I was in the area because I had been giving a camera club talk about an hour away, and somebody recommended that I visit Cobbolds Point. I had not planned the shoot around the location, the weather or the light. The only thing I had really considered was the tide.
Sometimes those unplanned detours turn out to be rather good decisions.
Fine Art Landscape Photography Cobbolds Point
Join me for some landscape photography at Cobbolds Point, where I capture the dramatic textures of the shoreline.
Visiting Cobbolds Point, Felixstowe
Cobbolds Point is situated on the Felixstowe coastline in Suffolk, looking out towards the North Sea. It forms part of the wider Felixstowe seafront, but it has a noticeably more open and less commercial character than some of the busier parts of the town.
Local planning information describes the area between Felixstowe Ferry Golf Club and Cobbolds Point as having an open green cliff top and a relatively undeveloped character, with traditional beach huts and gardens. Coastal management works have also improved access around Cobbolds Point and helped create a more continuous coastal route.
For a landscape photographer, that combination of open sea, shingle, coastal defences and constantly changing water makes it an interesting location.
The Felixstowe coastline itself stretches for several miles and includes a mixture of sand and shingle beaches. The more rural stretches around the northern part of the town provide a very different atmosphere from the busier areas around the pier and seafront.
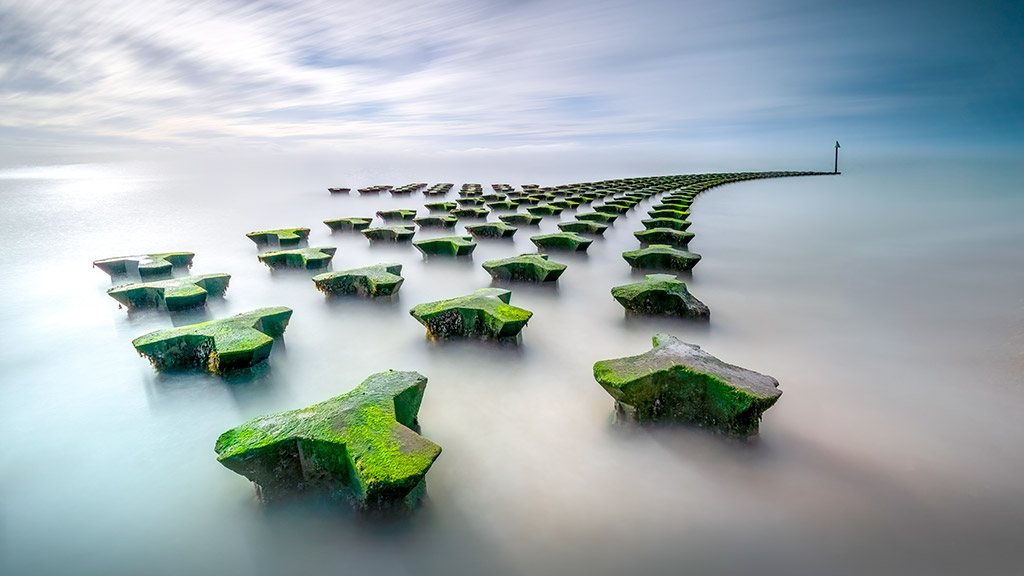
Cobbolds Point is particularly interesting because of its sea defences. The shoreline includes rock armour and substantial coastal structures, including two fishtail breakwaters. These man-made features might not sound particularly exciting when you describe them on paper, but photographically they can provide fantastic leading lines and foreground interest.
And that was exactly what attracted me.
The Tide Was Going to Be Important
When I arrived, high tide was still more than two hours away.
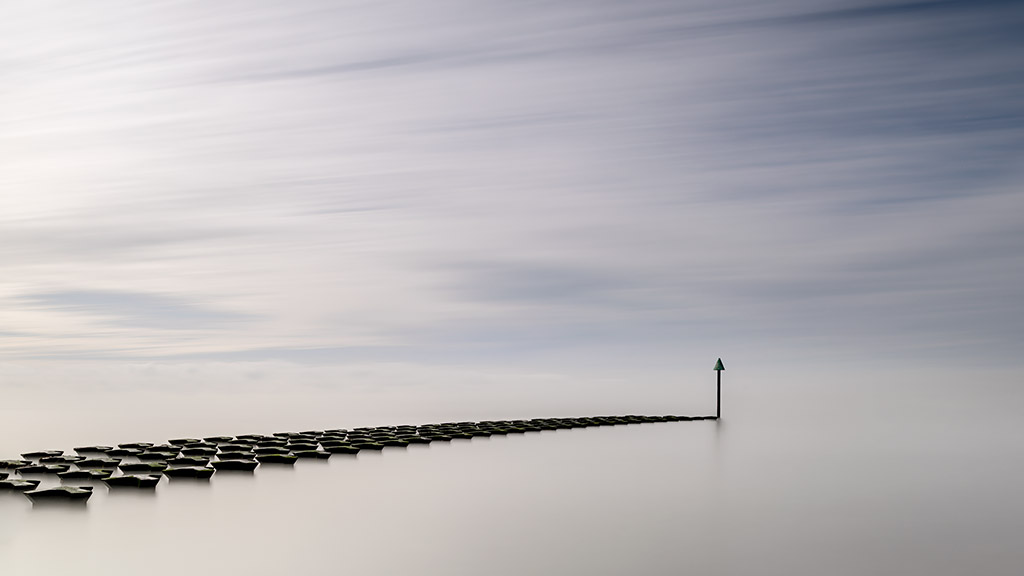
The water level looked almost perfect, and I had calculated that as the tide continued to rise, the water should eventually come up and over parts of the breakwaters.
That was going to give me an opportunity to photograph the structures with water surrounding them rather than simply photographing them sitting on the beach.
One of the useful things about a location such as Cobbolds Point is that the appearance of the scene changes considerably as the tide comes in.
Local photography information for the location also highlights the sea defences as particularly interesting for long exposure photography, with the appearance of the structures changing significantly depending on how much of them is exposed above the water. It also warns that the rocks can be slippery and that access between the defences is not possible at high tide.
That last point is important.
If you are planning your own photography trip here, don’t simply look at a tide table and think, “That’ll do.”
Think about what the tide will actually be doing when you arrive.
Finding the Composition
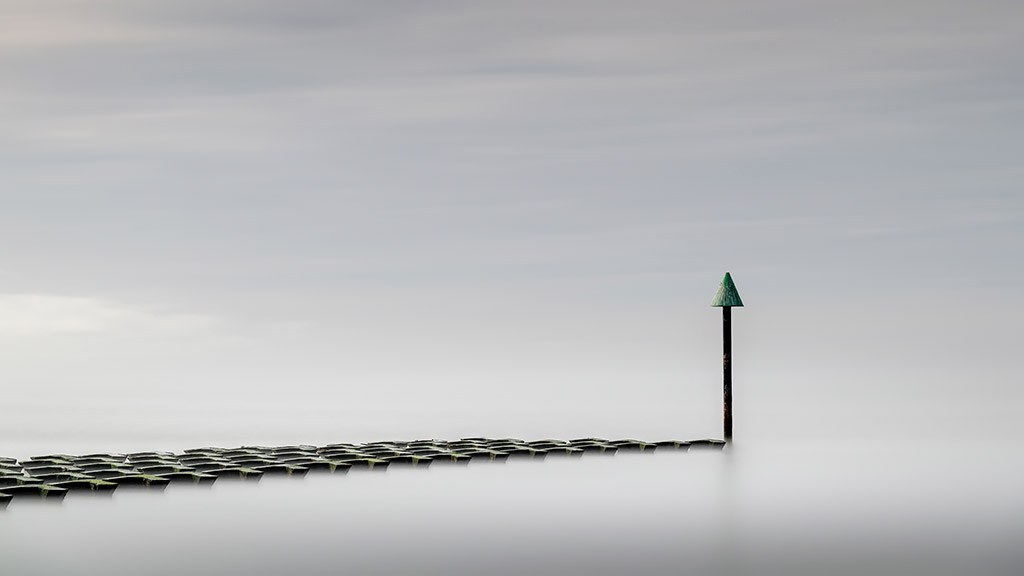
My first idea was to get the camera really low.
I had my wellies on because I wanted to get into the water and position the camera close to the breakwaters. My intention was to exaggerate the wonderful green surfaces of the coastal structures and make them a strong part of the foreground.
Getting the camera low can completely change the appearance of a landscape.
Rather than looking down at the subject, you are almost putting yourself inside the scene. Small details suddenly become much more prominent, and surfaces that might otherwise be insignificant can become major elements within the composition.
I was also thinking carefully about how I wanted the viewer’s eye to travel through the photograph.
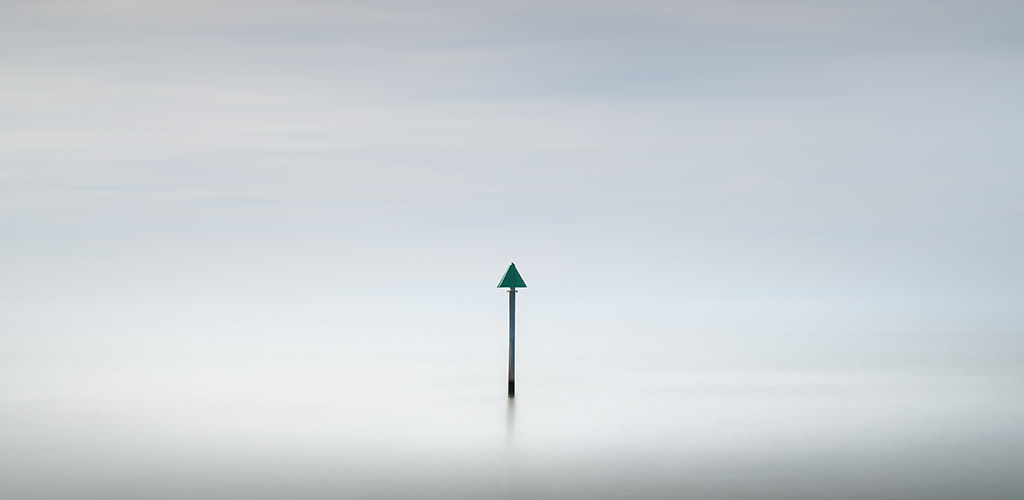
I had a marker towards the top right of the frame and another possible point of interest towards the bottom left. By placing these elements in different areas of the image, I could create a natural journey through the photograph rather than simply putting the main subject in the centre.
This is something I often think about when composing landscape photographs.
Don’t just ask yourself, “What am I photographing?”
Ask yourself, “Where do I want the viewer to look first, and where do I want their eye to go afterwards?”
That simple change in thinking can make a surprisingly big difference.
In this case, I wanted the foreground breakwater to lead the viewer into the frame and towards the distant marker. I also wanted to remove as much unnecessary clutter as possible from the left hand side.
The composition started to come together.
And then came the slightly awkward bit.
Landscape Photography Cobbolds Point
Taking a Long Exposure in the Sea
I wanted to use a tripod, but putting tripod legs into moving water is not exactly ideal.
Every time a larger wave came in, I could actually feel the tripod moving.
That’s obviously a problem when you’re trying to create a long exposure.
If your tripod moves during a 30 second, two minute or four minute exposure, you can end up with a beautifully blurred sea and a beautifully blurred landscape.
Which isn’t quite what we’re after.
I considered moving further back and zooming in, but I had already spent a lot of time constructing the composition and I really liked what I had.
So I decided to stick with it.
My first exposure was around 30 seconds. I used a 10 stop filter and made sure my focus was correct before starting the exposure.
The result was encouraging, but the changing light was making things considerably more complicated.
The sky was incredibly bright.
This is one of those situations where having a range of neutral density filters becomes extremely useful.
Why I Use a 15 Stop Filter
One of the techniques I discussed during the shoot was the use of a 15 stop neutral density filter for long exposure landscape photography.
A 15 stop filter is incredibly dark.
Its job is to reduce the amount of light reaching the camera sensor, allowing you to use much longer shutter speeds even when you’re shooting in bright conditions.
For me, one of the big advantages is simplicity.
When conditions are bright, I can use my 15 stop filter and work towards a two minute exposure without spending ages trying to work out whether I can squeeze a long exposure out of a 10 stop filter by stopping the lens down to something like f/22.
My approach is deliberately simple.
Bright conditions?
15 stop filter.
Around two minutes?
That’s my starting point.
I can then adjust from there if necessary.
The transcript from the shoot shows exactly how I approached this. After initially trying a shorter exposure, I decided to work with the 15 stop filter and around two minutes for some of the more demanding compositions.
Of course, there is nothing magical about exactly two minutes.
It is simply a practical starting point.
If your exposure is too dark, reduce the shutter time or adjust your aperture. If it is too bright, increase the shutter time or make another adjustment.
The important thing is understanding what the filter is doing rather than blindly following a formula.
Long Exposure Photography Tips
If you’re interested in trying long exposure landscape photography, there are a few things I have learned over the years that can save you a lot of frustration.
1. Use a solid tripod
This sounds obvious, but it is probably the most important thing.
A long exposure magnifies movement.
A tripod that feels perfectly stable during a normal photograph can suddenly reveal weaknesses when you are exposing for several minutes.
If you’re photographing beside the sea, this becomes even more important.
Waves hitting the tripod legs can introduce movement into the camera, so look for the most stable position you can find.
On this particular shoot, I actually had to retreat slightly because the water was making the tripod unstable. I eventually positioned the legs on the rocks rather than allowing them to sit in the water.
2. Don’t rely on f/22
Stopping the lens down to f/22 might appear to give you a longer exposure, but it isn’t necessarily the best way to approach landscape photography.
Very small apertures can introduce diffraction, which can reduce fine detail and overall sharpness.
Instead, use your neutral density filters to control the amount of light entering the camera.
I would much rather use a suitable aperture with a strong ND filter than automatically push the lens to its smallest aperture simply because I want a long exposure.
3. Compose before attaching the filter
This is a big one.
Strong ND filters are often so dark that you can struggle to see anything through the viewfinder or on the rear screen.
So compose first.
Get your tripod positioned.
Make sure your horizon is where you want it.
Check the edges of the frame.
Look for distractions.
Make sure you are happy with the composition.
Then attach the filter and take the photograph.
Otherwise you can end up removing the filter, changing the composition, putting the filter back on and repeating the process.
It becomes tedious very quickly.
4. Focus before the exposure
Again, do your focusing before putting the darkest filter on.
Once you’re happy with focus, switch to manual focus if necessary so that the camera doesn’t suddenly decide to hunt for focus when you start the exposure.
In my case, this particular scene was complicated because I wanted to get extremely close to the foreground.
That can create depth of field problems.
If the foreground is very close to the camera and the background is relatively distant, you may need to consider focus stacking.
5. Check the tripod after every major wave
This is particularly important when working beside the sea.
You might compose a perfect image and start a two minute exposure, only to discover that a wave has shifted one of the tripod legs.
I could actually feel movement through the tripod during this shoot, which immediately made me question whether the original position was going to work.
If you are working close to moving water, don’t simply set the camera up and walk away.
Keep an eye on it.
6. Watch your highlights
Long exposures aren’t automatically easier than conventional exposures.
In fact, they can sometimes make difficult lighting even more challenging.
During this shoot, the difference between the brightness of the sky and the darker sea and foreground was enormous.
That meant a single exposure wasn’t necessarily going to capture everything I wanted.
For one composition, I planned to take separate exposures, including a darker exposure specifically for the sky.
This is where exposure blending can become extremely useful.
You can capture the detail you need in each part of the scene and combine those exposures later in Photoshop.
7. Don’t be frightened of multiple exposures
There is sometimes a strange idea that taking multiple exposures somehow makes a photograph less authentic.
I don’t agree.
If the dynamic range of a scene exceeds what your camera can comfortably capture in one exposure, why make life unnecessarily difficult?
Capture what you need.
A foreground exposure.
A background exposure.
Perhaps another for the sky.
Then use your judgement during post-processing.
The important thing is that you’re still creating the photograph rather than allowing the camera to dictate what is possible.
Using a 15 Stop Filter in Bright Conditions
A common misconception is that long exposure photography is something you should only do on miserable, overcast days.
I actually disagree.
Bright conditions can be incredibly useful if you have a sufficiently strong ND filter.
During the Cobbolds Point shoot, the light became exceptionally bright and harsh. It was so bright that I was physically struggling to keep my eyes open while looking towards the scene.
A 15 stop filter gave me the ability to continue working with long shutter speeds despite the amount of light available.
As I mentioned during the video, you can also combine filters.
For example, if you have a 10 stop filter and a 3 stop filter, you can use them together to achieve a 13 stop reduction. A 10 stop combined with a 6 stop filter would give you 16 stops.
The exact combination depends on what filters you own and what exposure you’re trying to achieve.
The important thing is understanding the principle.
More filtration means less light reaching the sensor, which means you can use a longer shutter speed.
And longer shutter speeds allow moving water to become something completely different.
Photographing Moving Water
This is where long exposure photography becomes particularly interesting.
Water changes character depending on your shutter speed.
A relatively short exposure might freeze individual waves and reveal texture.
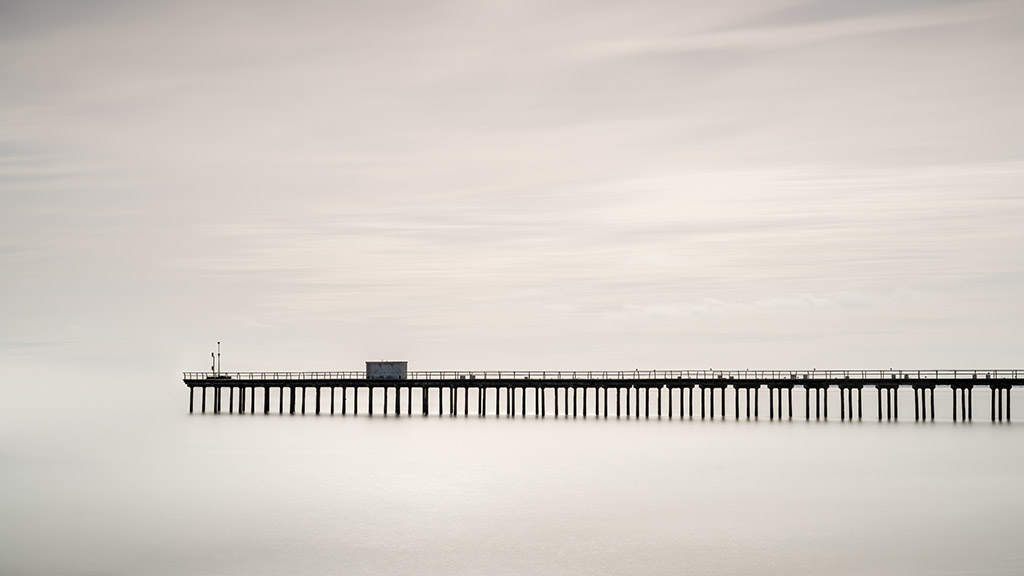
A longer exposure can smooth the surface and create a much calmer appearance.
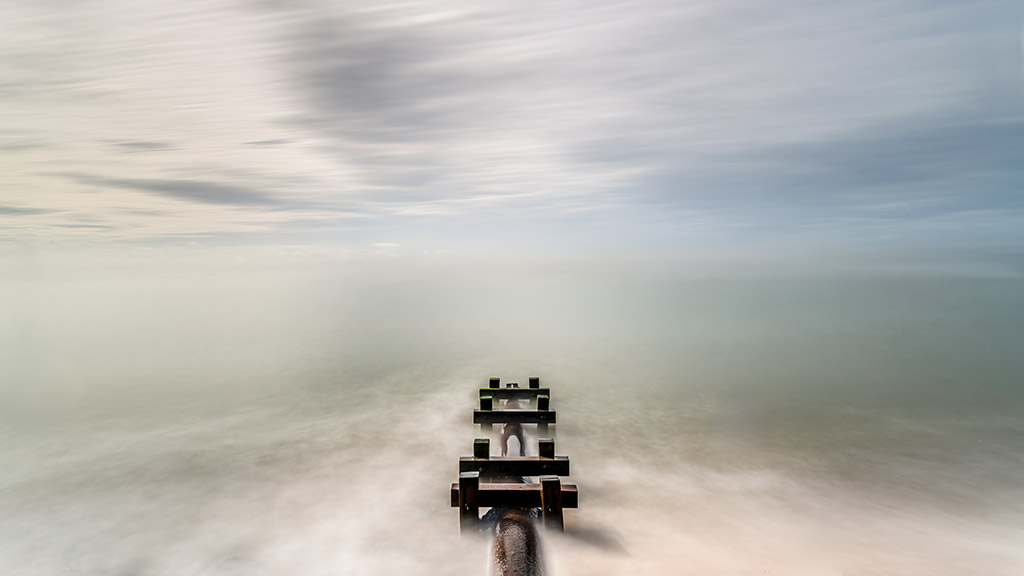
Push the exposure further and the water can become almost mist-like.
There isn’t a right or wrong shutter speed.
It depends entirely on the effect you want.
At Cobbolds Point, I was particularly interested in creating a sense of movement while retaining the strong structure of the coastal defences.
The combination of solid, static foreground elements and constantly moving water is something I really enjoy.
The rocks don’t move.
The breakwaters don’t move.
The water does.
That contrast gives you something to work with.
The Problem With the Light
Ironically, the shoot started brilliantly.
The skies looked fantastic.
The water was relatively calm.
The conditions initially seemed to be working in my favour.
And then the light changed.
Very quickly.
The harsh sunlight made the scene incredibly difficult to photograph in the way I had originally imagined. The stronger the light became, the greater the contrast between the bright sky and darker foreground.
There was a point where I was genuinely questioning whether I’d get anything worthwhile.
But there is another side to difficult conditions.
When everything is easy, getting a good photograph is satisfying.
When everything is working against you and you still manage to create something you’re proud of, it feels considerably more rewarding.
That was certainly the case here.
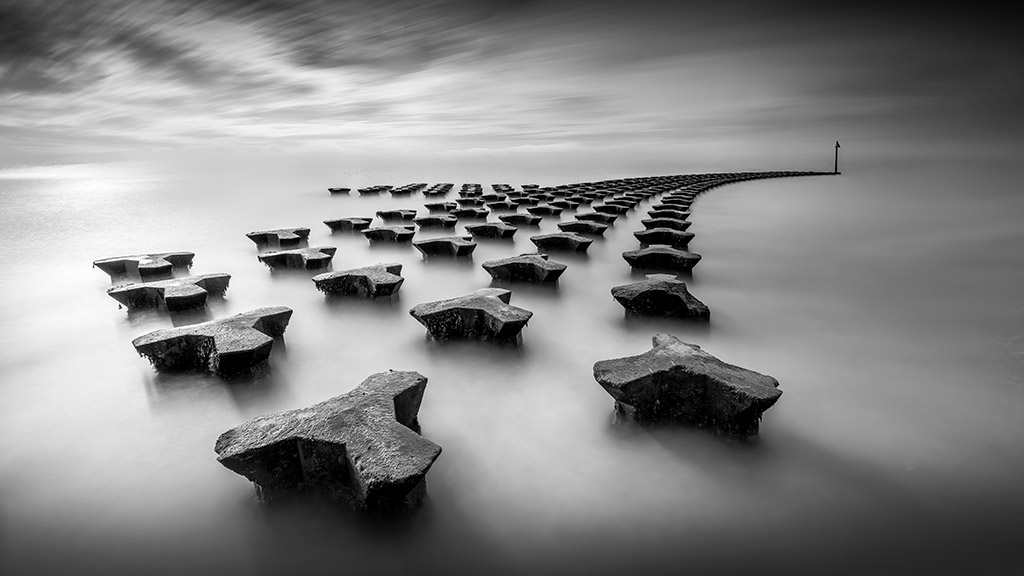
Black and White Photography
Because of the harsh lighting, I was already thinking about black and white photography.
Sometimes colour can actually become a distraction when the light isn’t particularly flattering.
Black and white removes colour from the equation and allows you to concentrate on shape, texture, contrast and composition.
And Cobbolds Point has plenty of texture.
The shingle.
The rocks.
The weathered coastal structures.
The movement of the water.
The sky.
These are all elements that can work extremely well in monochrome.
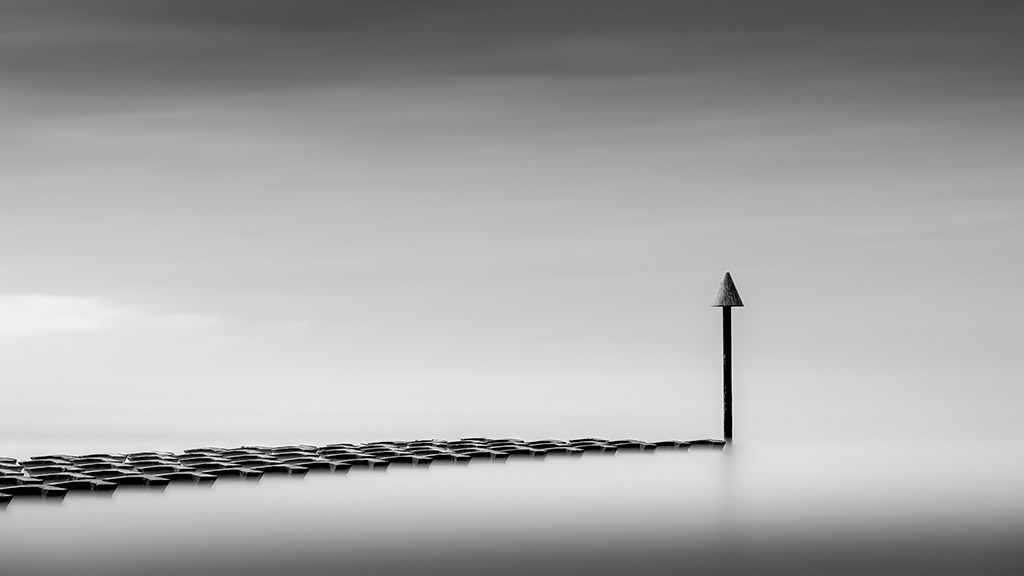
At one point I was looking at a composition containing very little other than the sea and a pipe-like structure and thinking that, although the harsh light was problematic, it could potentially make a very interesting black and white photograph.
That is another lesson I think is worth remembering.
Don’t automatically abandon a composition because the light isn’t doing what you hoped.
Ask yourself whether you can approach it differently.
Maybe the answer is black and white.
Maybe it’s a tighter crop.
Maybe it’s a different focal length.
Maybe you simply need to wait.
Or maybe, like me, you need to accept that the conditions are difficult and work with what you’ve got.
Cobbolds Point for Landscape Photographers
I think Cobbolds Point is an interesting location for photographers because it gives you plenty to work with without requiring a huge amount of visual complexity.
The sea defences provide strong geometric shapes and leading lines.
The shingle provides foreground texture.
The sea gives you movement.
The horizon provides simplicity.
And because the scene changes with the tide, you can potentially return to the same location and photograph it very differently.
Local information describes Cobbolds Point as a significant turning point along the Felixstowe coastline, with wide sea views and coastal structures that form an important part of the shoreline.
That simplicity appeals to me.
You don’t always need a spectacular mountain, waterfall or dramatic piece of architecture to make a successful landscape photograph.
Sometimes you just need to see an ordinary piece of coastline differently.
A Few Practical Tips Before You Visit
If you’re planning to photograph Cobbolds Point yourself, I’d strongly recommend checking the tide times before you travel.
Think about the tide rather than simply the weather.
Consider what percentage of the sea defences you want exposed.
If you want to photograph the structures surrounded by water, your ideal arrival time could be very different from somebody who wants to photograph them sitting prominently above the shoreline.
Also take care around the rocks and sea defences. Local photography guidance specifically warns that the rocks can become very slippery when wet, and that at high tide it may not be possible to move between the different sea defences.
Felixstowe Beach has no lifeguard patrol, so don’t treat a photography trip as an excuse to take unnecessary risks around the water. Follow local signage and use established access routes.
And, as always with coastal photography, give yourself plenty of time.
The photograph might take five minutes.
Getting into position can take considerably longer.
Was It Worth It?
Absolutely.
Was it an easy shoot?
Not remotely.
The light became horrible, the tripod was being battered by the waves, I had to reposition myself, and at one point I had what felt like half of the population of Suffolk turning up just as I was getting into my stride.
First a large group of schoolchildren appeared.
Then, once they had disappeared, a family decided to sit down almost immediately beside me.
There were miles of beach.
Of course they chose the bit where I was trying to take a two minute exposure.
That’s landscape photography for you.
But despite all of that, I enjoyed the shoot.
The conditions were challenging, but that made the possibility of getting a good image even more rewarding.
I hadn’t planned to visit Cobbolds Point.
I hadn’t planned the weather.
I hadn’t planned the lighting.
And I certainly hadn’t planned on spending quite so much time standing around in the water wearing wellies.
But that’s one of the things I enjoy about photography.
Sometimes the best photographs come from simply taking a recommendation, turning up somewhere you’ve never photographed before and trying to make something work.
Final Thoughts
Cobbolds Point in Felixstowe, Suffolk, might not immediately strike you as the sort of place where you could spend several hours creating fine art landscape photography.
But that’s precisely why I found it interesting.
The coastal defences provide structure.
The sea provides movement.
The shingle provides texture.
The changing tide continually alters the scene.
And with a decent set of neutral density filters, you can create long exposures even when the sunlight is far brighter than you would normally choose.
For me, the biggest lesson from this shoot wasn’t really about filters or shutter speeds.
It was about persistence.
The conditions were brutal.
At one point I was seriously questioning whether I’d managed to capture anything worthwhile.
But I kept working.
I changed my position.
I adjusted the composition.
I experimented with different exposure times.
I considered black and white.
And eventually, I came away believing that I’d captured one or two images that I could genuinely be proud of.
That’s landscape photography.
You don’t always get the conditions you want.
You don’t always get the photograph you imagined when you arrived.
But sometimes, if you stick with it, you can find something better.
And occasionally, the most difficult days behind the camera produce the photographs that mean the most.
If you’re interested in long exposure landscape photography, I’d definitely recommend giving a location like Cobbolds Point a try. Just remember to check the tide, watch your footing, take plenty of time to construct your composition and, if the light turns horrible, don’t immediately pack the camera away.
You might just be surprised by what you can create.
Gary Gough
Professional Photographer | West Yorkshire
www.garygoughphotography.co.uk
► WORKSHOPS
► ABOUT ME
► MY GEAR
► FACEBOOK
► YOUTUBE
► INSTAGRAM
Tell us about your thoughtsWrite message